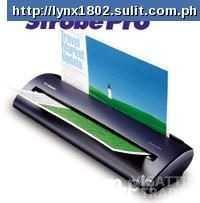
VISIONEER Strobe pro Sheet Scanner

Ad Information
Ad Description
Visioneer Strobe Pro sheet scanner 85-0037-400
*Kindly please read po carefully to avoid chains of exchange messages Thank you!
Disclaimer: SELLING AS IT IS.. Please if do have inqiries Call directly thru landline or cellphone text will seldome be replied, if no reply means not interested, this saves us both time and load. Thanks po for understanding.
Good day all! Selling my personal Strobe pro sheet scanner, used and working fine until I lost the Installation CD.
Is easy-to-use, 30-bit sheetfed scanning and software solution for Mac and PC. With a unique slim and compact footprint, the Strobe Pro scans black and white text at up to an interpolated resolution of 2400 dpi. The scanner plugs easily and effortlessly to your USB or serial (PC only) port. Bundled with ScanSoft PaperPort software, the industry’s leading desktop and image management software application, Visioneer Strobe Pro offers an all-in-one scanning and price/performance desktop solution
You will get:
- Visioneer Strobe Pro Sheetfed Scanner
- USB cable and AC Adapter.
Scansoft PaperPort Deluxe 7 is: for Windows 95, 98, 2000, NT, ME, XP, and Macintosh (up to 9.x) Windows 7 not compatible..
The scanner works on both Windows 95/98/2000/ME/XP and later Macintosh O.S. (Mac SCSI and Mac Serial up to OS 9.2). Mac and users may need a USB cable.
Windows XP Users: This scanner WORKS with Windows XP using the included Parallel cable. We tested and came up with an Installation Guide to make it work with your Windows XP computers. (see below)
Mac OS X Users: Based on Visioneer site, there is no drivers for Mac OS X.
Issue: CD Software driver not Included: misplaced!!
Downloadable site http://support.visioneer.com/products/StrobePro/downloads.asp
* Those who knows how to set it up will find this scanner useful, newer driver version I think can also scan colored pictures and working on a newer O.S. version of windows and mac try to just check.
Interested can PM me or may Call at 4758754/ 09297503738
preferred meet up point: C.A.A. McDonald in front of Southville International School, Las Pinas
Thank you for viewing and God Bless!!
This add will be deleted once sold!
** Proceedure of Installation:
Installation Guide for Windows XP and Windows 2000
This guide is for the installation of Visioneer Strobe Pro Scanner using Parallel Port Connection. You may adapt it for use with the Serial Port Connection.
- At this step, please do not connect the scanner to your computer. Turn on your computer then right click on the My Computer icon on the Windows desktop or from the Start Menu on Windows XP, select Properties, then select the Hardware tab.
- Click on the Device Manager button.
- Click on the + to the left of Ports to expand Ports.
- Click on the ECP Printer Port (LPT1) to highlight it and then right click on ECP Printer Port (LPT1) and click on Properties.
- Click on the Port Setting tab to bring it to the front and check the Enable Legacy Plug & Play detection box.
- Click on the Ok button, close Device Manager, and close System Properties.
- Turn off computer.
- Plug the PC end of the PaperPort Strobe cable into any parallel LPT port on the back of you computer.
- Plug the other end of the PaperPort Strobe cable into the round port on the back of the scanner.
- Plug the power adapter cable into the jack on the PaperPort Strobe cable.
- Now plug the power adapter into an AC outlet and listen for a short hum from the scanner, indicating it is receiving power.
- Turn on the computer and start Windows.
- The computer will detect the scanner and open the Found New Hardware Wizard window. Click Cancel to exit the wizard.
- Insert the StrobePro CD into the computer. It should start automatically. If not, start the CD via the CD-ROM icon in My Computer.
- Click on Scansoft PaperPort and then click on Install Scansoft PaperPort. Read and accept agreement. 16. In the PaperPort Setup window, expand Strobe Pro Windows NT 4.0, and then highlight Strobe Pro Parallel NT 4.0, and click Next.
- Accept default destination location by clicking next. File copying will start.
- Provide registration information (required to proceed with the installation). You need not be online to fill out registration. If Windows Security Alert window pops up, click on Keep Blocking.
- Close registration thank you window and then ignore warning message from XP.
- Click Finish and restart computer. Ignore PaperPort Scanner not found warning by clicking Continue. Accept Disable Scanner.
- When Found New Hardware Wizard window comes up, click Cancel.
- Right click on the My Computer icon on the desktop, select Hardware tab, select Device Manager, and expand Other Devices (which shows a yellow question mark). Click on Visioneer Cx6. Then right click and select Uninstall.
- Click Ok.
- Eject CD and restart computer. If Found New Hardware Wizard window comes up, repeat step 22 and restart the computer again.
- For calibration, prepare a calibration page by cutting a plain, bright-white, 8-1/2” by 11” sheet of paper into a page that measures 9” by 8”. Insert the 9-inch edge (the wider edge) of the calibration page into the scanner such that the page extends over each of the two paper guide marks. The scanner will grab the page and move it forward and backward. Calibration takes about a minute. Do not pull the paper of the scanner while calibration is in progress.
- The scanner is now ready for use.
Compared Ad


